As with any new endeavor, you probably want to go from 0 to 100 as quickly as you can. But you need a solid foundation to build on. Learning fundamentals through photography 101 not only helps you learn faster but also helps produce better images. The information can be overwhelming for beginners to grasp at first. But with practice and repetition, you’ll pick things up in no time.
Photography Basics: Exposure
Photography is all about how light works and shapes your photos.
Exposure refers to the amount of light that enters through the lens and hits the camera sensor.
If you’re shooting in conditions with plenty of light, you’ll end up with bright photos. While dark photos, conversely, are the result of shooting in low-light conditions. In photography terms, they’re referred to as high-key (bright), and low-key (dark).
Modern cameras come with plenty of automatic modes that do the heavy lifting for you. This allows you to shoot at will and still come away with great photos. But if you want to get the most use out of your camera, and more creativity out of yourself, you need to learn how to shoot in manual mode.
Manual mode gives you total control over your photos. It requires you to master 3 camera functions that work in unison and form the “exposure triangle”: aperture, ISO, and shutter speed.
Aperture
Aperture refers to the size of the opening of your camera’s lens. The opening you shoot at will determine two things:
- how much light is let in / how bright the photo is
- the depth of field (or focused area) of the photo
It helps to think of the lens like a pupil. A pupil dilates (opens), letting lots of light in. Conversely, it constricts (closes), limiting the amount of light.
If you’re shooting on a sunny day with the lens wide open, you’ll end up with a very bright photo, and possibly have blown-out areas due to overexposure. Whereas, when you constrict/close the lens, the image dims, even on the sunniest of days.
Shooting the night sky with a small aperture (closed lens) will produce a pitch-black photo. This is due to the closed lens only letting in a minimal amount of light in an already dark environment.
Whereas, if you open up the lens (large aperture), more light is allowed in for you to get that shot of the Milky Way. This is why night photographers gravitate toward lenses that have a very low f-stop, which allows the maximum amount of light to enter the lens.
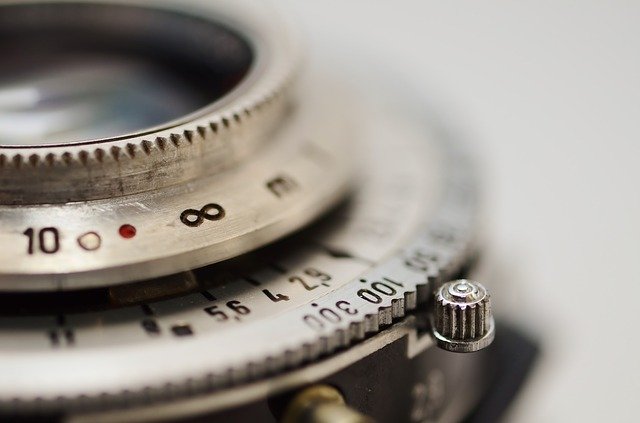
What Are F-Stops?
Aperture values are expressed in f-stops.
Lenses vary in how wide they can open and how tight they can close, but you’ll see a variation of the following f-stops on most lenses:
f/1.4 | f/2 | f/2.8 | f/4 | f/5.6 | f/8 | f/11 | f/16 | f/22 | f/32
These numbers are known as full stops. Going up the scale, each full stop doubles the exposure, and going down the scale, the exposure gets cut in half. Most lenses also allow you to shoot in between full stops (ie. f/3.6, f/7.1, f/18).
Wide apertures (lots of light) are the smaller numbers (f/1.4), and small apertures (less light) are the larger numbers (f/22). The f stands for focal length, and the number is a fraction of the focal length. This fraction tells you the physical diameter of the opening.
For example, if you have a lens with an 80mm focal length, and you’re using it at f/8, your aperture diameter is 10mm wide (80 divided by 8). If you use it at f/2, the aperture diameter is 40mm. If you use it at f/22, your aperture diameter is 3.6mm.
What F-Stops Do To Your Photos
In addition to controlling the amount of light, f-stops determine the depth of field (or focused area) of your image.
Large apertures like f/2.8 have a smaller depth of field. These low f-stops separate a subject in the foreground from the background. This technique is prevalent in portrait and wedding photography. The subject(s) are isolated and in focus, while the background is blurred out. This blurred background effect is known as bokeh.
A low f-stop of f/2.8 will produce a very blurry background, whereas f/4 will be less blurry. Higher f-stops like f/8 and f/11 keep the entire image in focus, which is beneficial for landscape, street, and travel photography.
Lenses differ when it comes to image quality and overall optics, but f/8 to f/11 is usually the sweet spot for overall image sharpness.
ISO
While aperture controls light and depth of field, ISO controls your camera sensor’s sensitivity to light.
ISO stands for International Organization for Standardization, and the term goes all the way back to the days of shooting on film.
This governing body ensures the same sensitivity standards for digital sensors across the board. This means a photographer can use the same ISO value on any camera, and always have identical exposure on their photos.
A common range for ISO values is 100, 200, 400, 800, 1600, 3200, 6400. Most digital cameras give you plenty of in-between values to choose from. You can also automatically set your ISO within a specific range that the camera will choose from.
How To Use ISO
The ISO value you shoot at will affect your image quality.
When lots of light is present, you can use a very low ISO value. Once you start to lose light (or you’re shooting at night), you’ll have to increase your ISO value to compensate for the dark conditions.
Low ISO values allow for crisp photos with a wide dynamic range, while high ISO values introduce image degradation and noise (aka grain) into your photo. A low value of ISO 100 allows you to take a pristine photo in daylight conditions. A high ISO of 3200 will be overkill for daylight photos, flooding the image with too much light. High ISO values are good for capturing images at night, as they pump up the brightness of your dark surroundings.
While higher ISO values degrade your image quality, you have to increase them a substantial amount to start seeing major image degradation. A value such as ISO 1600 is still pretty crisp. Some photographers don’t even mind a high ISO value as it replicates grain, which is one of the unique characteristics of shooting on film. However, post-processing programs can replicate grain for greater control over your images.
In a nutshell, the lower you can keep your ISO, the better. But many times you have no choice but to increase it when shooting in dark conditions.
Shutter Speed
The third piece of the exposure triangle is shutter speed.
Inside every camera, there’s a shutter positioned in front of the sensor. When you take a photo, that unmistakable “click” sound is the shutter opening and closing. Shutter speed determines how you capture motion, and by having total control over the shutter, you can freeze motion, or emphasize it.
On your camera, you’ll find a range of shutter speed values that resemble the following:
1/2, 1/4, 1/8, 1/15, 1/30, 1/60, 1/125, 1/250, 1/500, 1/1000, 1/2000
These fractions represent how long the shutter stays open in relation to a single second.
For instance, 1/2 is half a second, and 1/4 is a quarter of a second. These are slow shutter speeds, as they keep the shutter open for longer durations of time. They emphasize blur and motion. On the other hand, 1/500 of a second and 1/2000 of a second are fast shutter speeds. They open and close the shutter quickly, making them ideal for freezing fast-moving subjects.
Shutter Speed Examples
Scenario #1: You want to freeze motion (ie. animals/pets, kids, cars, bikes, trains, etc.)
Photographers use a fast shutter speed to freeze motion.
Let’s say you want to take photos of your dog. Your dog is most likely not going to sit there and pose for you. They like to randomly move around (especially when you’re trying to photograph them). In order to “freeze” the dog, you have to use a fast shutter speed.
Scenario #2: You want to emphasize motion (ie. moving people/vehicles, light trails, the soft water effect, blurred clouds, star trails)
This technique involves keeping the shutter open for a prolonged period of time.
A popular example of this is photos with light trails. By opening the shutter for a few seconds, the lights drag across the camera’s sensor as the vehicle moves through your frame. The soft water effect is another common slow shutter speed photo. This requires you to keep the shutter open for around 10 to 15 seconds, which gives moving water that dreamy look.
Fast Shutter vs. Slow Shutter
Shutter speed can dramatically alter the look and feel of your photo. But fast shutters let in less light and slow shutters let in more light. As shutter speed is part of the exposure triangle, you’ll have to balance the exposure by fine-tuning the aperture and ISO values. Through repetition, you’ll know your camera inside out be able to dial these in quickly so you don’t miss your shot.
Photography 101 For Better Photos
Understanding the exposure triangle can help your photo become more expressive. Using the fundamentals of photography 101, mastering aperture, ISO, and shutter speed will make you a better photographer. You’ll instinctively know which values to use in any situation, and shooting in manual mode will produce optimal results.